
Because of the pandemic, many people are learning how to print postage online for the first time. In most circumstances, making a trip to the post office would perfectly safe, but now that is not the case. Most people know that you can print postage online. However, did you know that you can print postage on PayPal at a discount?
While it is possible to print postage on the USPS website, the interface is buggy and the postage rates are the same as the retail price. Whether you’re sending a gift to your dad for Father’s Day or shipping 10 orders per day for your brand new eCommerce store, there is no reason to use the USPS website to print postage.
Today, we are going to show you how to print postage on PayPal. For this tutorial, we will assume you have a business account. Individuals can still print postage on PayPal’s website, but the navigation is a little different.
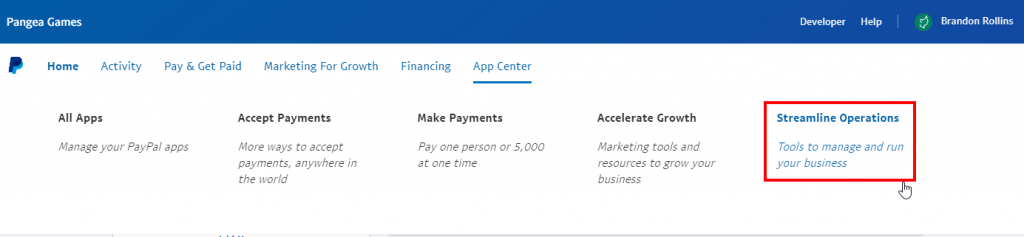
1. On your PayPal account, click App Center, then Streamline Operations.
Once you have logged into PayPal, you’ll notice that there is a navigation bar near the top listing a handful of links. The last one is App Center – that’s the one you want to click on. After that, you will see a submenu, where you will want to click on Streamline Operations – Tools to manage and run your business.
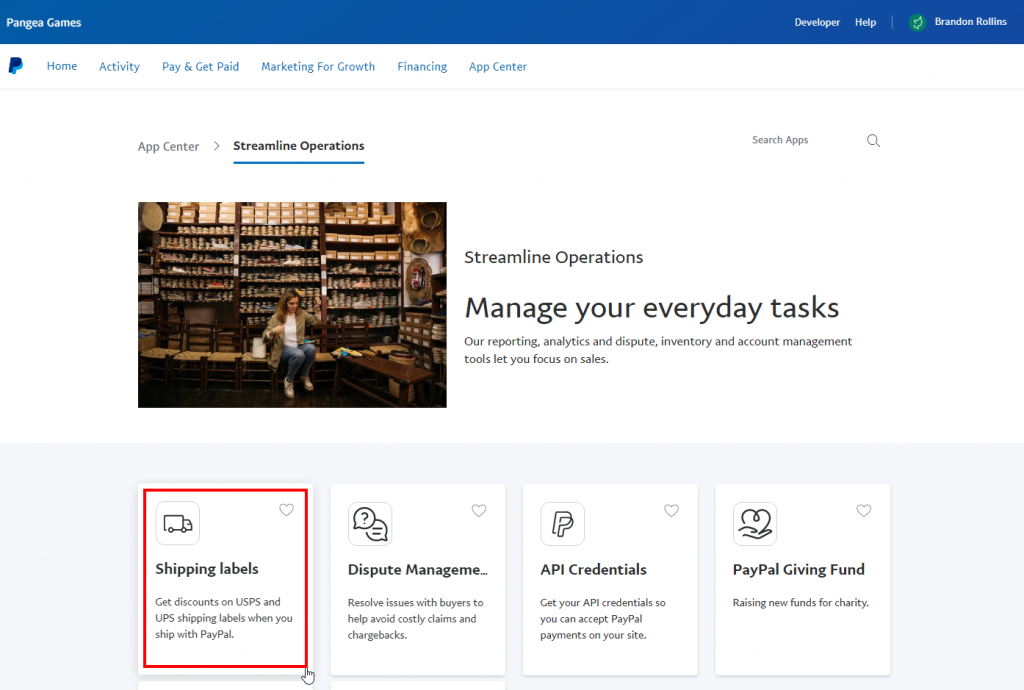
2. Click Shipping labels.
On the following page, you will see a variety of different options. PayPal is a very feature-rich system, but we won’t go into all the features in this tutorial. Instead, we’ll focus simply on printing postage. Click Shipping labels.
3. Click Get Started.
On the following page, click Get Started. Bear in mind, you can only print USPS and UPS postage this way. FedEx, DHL, and other carriers require postage to be printed in other ways.

4. Enter order and shipping details and click Continue.
At this point, enter your shipping information. Be sure to write in your Seller Address and the recipient’s Shipping Address. Double-check the information and make sure the information is all correct. Then click Continue.

5. Select service type and enter package weight. Then click Create shipment.
Select the service type that you would like. You can choose First-Class or Priority shipping. Then select the Package type and enter a Package weight. If you have to guess, round up on weight. Having too little postage means your package could be returned.
At this point, you can add tracking and insurance if needed. For expensive packages, you may want to add insurance. When you’re done, click Create shipment.

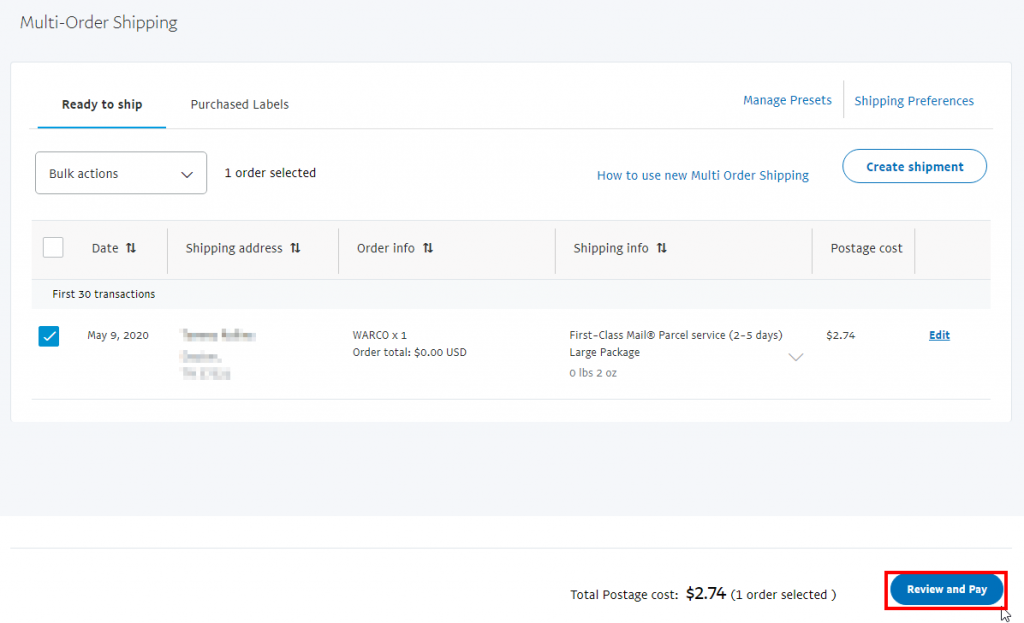
6. Select the shipment you want to print a label for and click Review and Pay.
Select the shipment which you just created and click Review and Pay. If you want to create multiple shipments before paying, click Create shipment and make another shipment first. Repeat this process until you’ve created all the shipments you need to create.
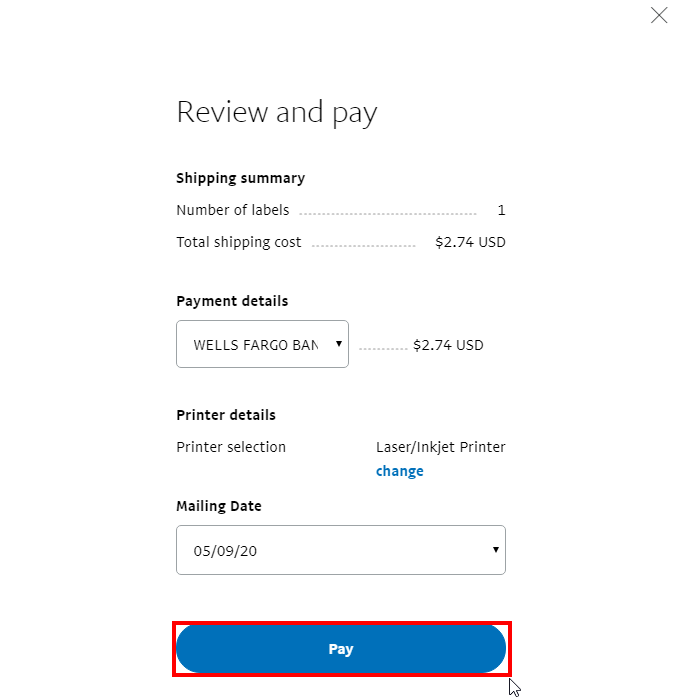
7. Choose a mailing date and click Pay.
Double-check the charge before paying. On this screen, you’ll also select a Mailing Date. If your mail has already been picked up for the day, be sure to pick the next mailing day. Then click Pay.
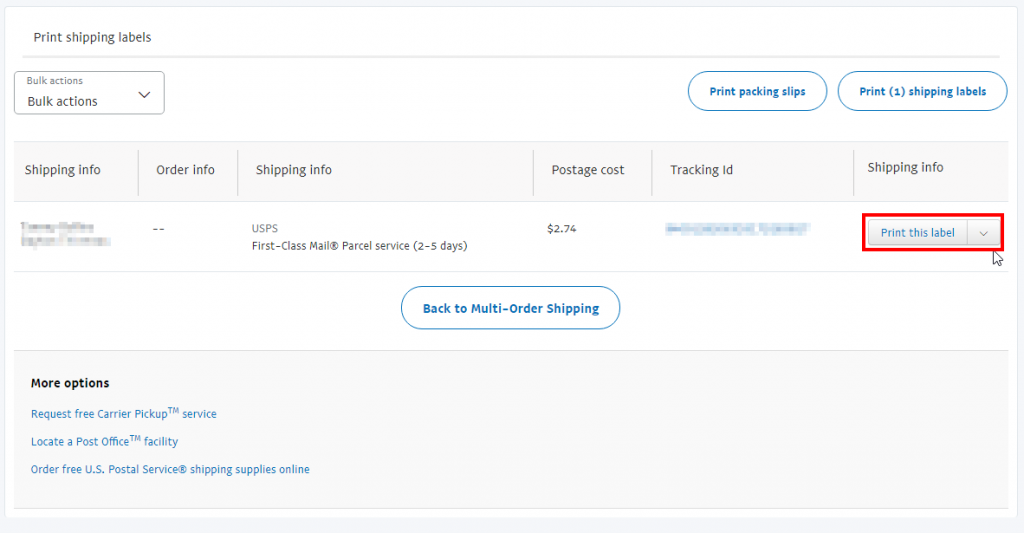
8. Click Print this label.
After you have paid for your shipping labels, click Print this label next to each shipment that you want to print.
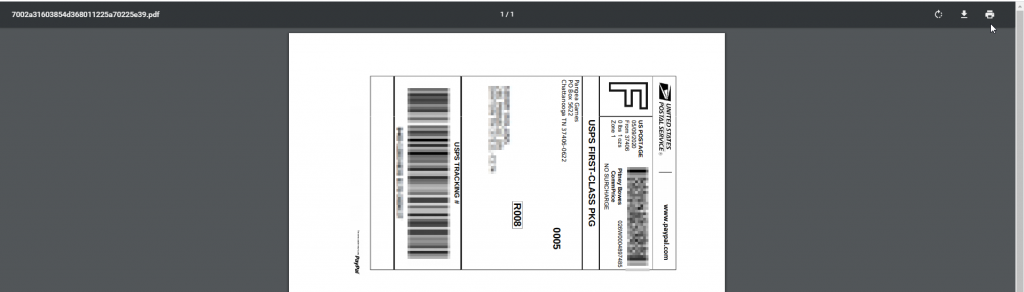
9. Print the shipping label.
You will then see a label like the one below. Print the label and affix it to the package you want to ship. Then put the package in your mailbox with the flag up for delivery!
Final Thoughts on Printing Postage with PayPal
PayPal makes it incredibly convenient to print small amounts of postage from your home. This can be great for businesses that do not have to ship on a regular basis. It’s also great for individuals who want to send gifts without going to the post office.
However, this is not an appropriate solution for everyone. If you are printing more than 50-100 packages per month, it is more cost-efficient to have a company such as Fulfillrite take care of the shipping on your behalf. That way, you don’t have to manually type in addresses, print postage, and pack packages. Someone will do all that for you. It will make it much easier to focus on what matters – scaling your business!
We hope you find these instructions useful for your occasional shipping needs. I know I’ve found it useful in the last couple of months!


